With Christmas coming up I decided I would share another gift wrap idea with you. This is another great idea I found on the almighty pinterest. The idea was originally intended for a little lunch box but some clever person put it on pinterest suggesting it would make a great little gift box and I totally agree. Click here to go the the website with complete instructions. The only thing I did differently was that I cut off the short flap on the front. I felt like it was in the way. I think I also cut the tall flap for the lid a little wider that the one in the tutorial which kind of made up for the fact that I cut off the front flap. I also didn't have any Velcro on hand, so I got creative and punched a couple of holes in the lid and in the base of the carton and ran some yarn through it. Tape on or glue on a tag.
30 November 2011
28 November 2011
Marshmallow Fondant in Stand Mixer
I am not a professional cake decorator, but I did work at a Mrs. Field's in the mall. I learned a thing or two about cake decorating making all those pretty cookie cakes. I would love to take a Wilton class to learn a bit more and improve the skills I kind of already have. So even though, I don't really know how to make fancy cakes and fillings and gum paste and fondant, but I like trying to make them. I have discovered a great decorating tool, Marshmallow Fondant. Marshmallow fondant is easy to work with and doesn't use a lot of ingredients. It is therefore great for a beginner like me who wants to make a cake a cool cake for their kids. And, because it is marshmallow fondant people (and kids) might actually eat the fondant, unlike the nasty fondant you usually peel off of the cake at a wedding. This recipe comes straight from Wilton.com. It's a sticky mess mixed together by hand. My sister-in-law called once to see if I had a recipe for fondant. I gave her this one. She is a busy mom with 7 kids and did not want to mix it by hand and wondered if she could mix it in a kitchen aid. I had no idea, I always mix it by hand. She said she would try it out and let me know how it worked. She said it worked great. So, when I needed to make a birthday cake for baby's 1st birthday on Nov 26 I knew I had to try to make it in the mixer. So if you want to mix it by hand, feel free to click on the link to Wilton.com for their instructions, but if you want to learn how to make it in a kitchen aid, stick around. I'll tell you how I did it.
Marshmallow Fondant
- 1 package (16 ounces) white mini marshmallows (use a good quality brand)
- 2-5 tablespoons water
- 1 tsp vanilla extract or almond extract (not in the Wilton recipe but I usually add something)
- 2 pounds sifted powdered sugar
- 1/2 cup shortening
Place marshmallows and 2 tablespoons of water in a microwave-safe bowl.
Microwave 30 seconds on high; stir until mixed well. Continue microwaving 30
seconds more; stir again. Continue until melted (about 2 1/2 minutes). IF you need to color your fondant ONLY one color you can add the food coloring to the melted marshmallow. If you need more than one color, you can knead it in after the fondant is finished.
Using some of that crisco, generously grease every inch or your mixing bowl and bread hook.
Pour half of the powdered sugar in mixing bowl. Add marshmallow mixture. Mix on low speed with stand mixer until marshmallow is completely incorporated. Add in the rest of the powdered sugar. If you don't want your powdered sugar flying everywhere wrap a piece of plastic wrap around the mixer and bowl.
Continue mixing until powdered sugar is kneaded in. Well, if you have large and very powerful kitchen aid kneading in all of the sugar may work for you. If you are like me, your Kitchen Aid is a small 4 1/2 mixer with only 250 WATS of power. It was sounding like it was working pretty hard, maybe a little too hard. For fear of my kitchen aids life I decided to turn off the mixer of before it could get all the powdered sugar mixed in.
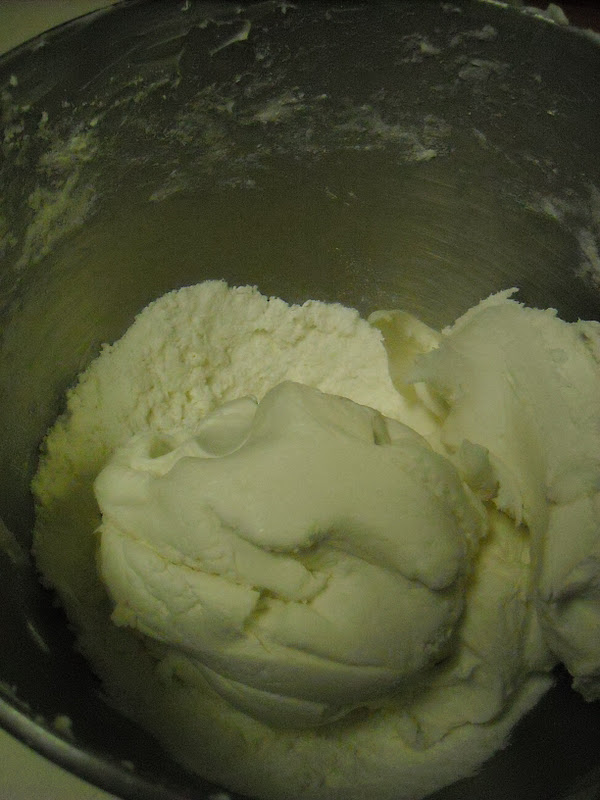
How it looked when I finally stopped my machine |
I kneaded in the rest by hand, which was still better that mixing by hand from the start, because the proccess really does start with a horrible, hot, sticky mess. Starting the fondant in the kitchen aid definitely eliminated that horrible, hot, sticky mess stage. If, like me, you do any kneading by hand generously grease the counter space and your hands with crisco as needed so the fondant doesn't stick (it makes for nice moist hands too). Continue kneading until fondant is soft and powdered sugar is mixed in. If fondant is dry add more water 1 tsp at a time.
If you need to make more that one color like me, take the amount of fondant needed for each color and knead in your food coloring.
Grease up each chunk of fondant with crisco and wrap very tightly with plastic wrap. Let sit for at least an hour before using (the longer the better).
I've heard you shouldn't store it in the fridge. I've heard you can store it in the fridge. It's just marshmallow and Crisco so it probably doesn't need refrigerated, but in my experience I don't think it matters either way. If you do choose to store it in the fridge it will get cold so it will be a little hard when you go to use it. You can pop it in the microwave for a few seconds to soften it up. BE CAREFUL. It has a lot sugar in it and sugar can get very hot very fast.
When you are ready to use your fondant, remember to put a layer or creamy frosting on you cake first. Roll out your fondant and cover your cake. There you have it, marshmallow fondant. I probably made it sound more complicated than it really is.
27 November 2011
The Versatile Blogger Award
I guess I get to say thanks to Kerrye at Impossible Cleanliness for nominating me for the versatile blogger award. I'm not entirely sure what this award is or how it was ever started, but it's nice to know that someone appreciates my blog. Honestly, this feels more like a game to me than an award and I am totally willing to play along because there are so many talented bloggers out there that deserve some recognition.
Like any award or game there are rules.
The rules:
- 1. Thank the award-giver and link back to them in your post.
- 2. Share 7 things about yourself.
- 3. Pass this award along to 15 recently discovered blogs you enjoy reading.
- 4. Contact your chosen bloggers to let them know about the award.
So lets start with the nominating some other blogs for the award. These are blogs that I enjoy reading and that I can always count on posting something worthwhile.
- Polka Dots on Parade
- Chef In Training
- Shugary Sweets
- Like Mother, Like Daughter
- Reasons to Skip the Housework
- Mom on Time Out
- Eat Cake For Dinner
- This Chick Cooks
- A Law Student's Journey
- Fresh Plate
- Happy Go Lucky
- Mushki Loves
- One Artsy Mama
- Sea Salt With Food
- B. Cheniful
Now here are 7 things you may not know about me:
- I can play the flute, piccolo, french horn, trumpet, and the mellophone. However it's been a while since I've touched anything other than my flute.
- If dragons were real they would be my favorite animal, but they aren't real so I claim dolphins as my favorite animal.
- My bachelor's degree is in Sociology.
- My favorite books are the Lost Years of Merlin Series by T.A.Barron. I love them, even though they are totally written for 13 year olds. I guess I could say the same thing about Harry Potter.
- I met my husband on a blind date.
- I'm only 5'1"
- This is something I probably shouldn't be proud of, but my roommate Danielle and I watched Mulan over 50 times in one semester. (It kind of became a joke after about the 10th time.) Me being a sociology major and her being a psychology major, we completely over analyzed every single detail of that movie. You don't miss much after 50 viewings. I'm not sure I've watched that movie again since that semester well over 5 years ago. I think my go to movie these days is Galaxy Quest.
Yep, I certainly am a strange one.
25 November 2011
Dessert Fruit Tacos
I have to credit to my husband for this idea. He absolutely loves fortune cookies and knew I could make them because I made them for him once before. We were looking through my pinterest boards for ideas for game day food and he noticed a picture of fruit tacos. He decided fruit tacos that used fortune cookie for the shell. Obviously, they weren't folded in to fortune cookies but sweet, crispy little taco shells.
As I said, I've made fortune cookies before using this recipe from Our Best Bites. You bake them in the oven and they're great. I wanted to look around for other recipes though and found one that baked them on an electric griddle, so I tried that recipe out for these tacos and say I prefer the griddle method. Use whichever you would prefer.
Fortune Cookie Taco Shells
- 1 egg
- 1/3 cup sugar
- 2 tablespoons oil
- 3 tablespoons water
- 1/4 cup corn starch
- 1/2 tsp vanilla
Filling
- 1 3oz box Coconut Cream Cook and Serve Pudding mix, or any flavor cook and serve/instant pudding mix you prefer
- Fresh Fruit, diced or sliced
Mix together egg and sugar together until thick and ivory colored. Stir in oil. Mix water and cornstarch together in a separate bowl. Add cornstarch mixture to egg mixture. Mix until smooth. Heat electric skillet to 340F. Grease griddle with a little bit of butter. Using a tablespoon, pour 1 level tablespoon of batter onto the griddle. Use back of spoon to spread the batter into a 4 inch circle cook 2-3 minutes until golden brown on bottom and then using a thin metal spatula flip over to cook the other side, 2-3 minutes until golden brown. Remove from griddle and then place on a clean surface for 15-30 second until cookie becomes cool enough to handle (trust me those cookies are hot!) but still warm enough that they can be molded. Drape cookie over the side of a square casserole dish to make taco shell shape, leave there until cookie is cool and holds shape. I recommend only cookie 2 cookies at a time. Butter the griddle in between cookies if needed. Don't worry if they aren't perfect little cookies. It takes a little practice. Mine started out hideous, but got prettier after I got the feel of what I was doing. Prepare pudding mix according to directions. Let cool. Dice fruit. Spoon or pipe pudding into cookie shells. Top with diced fruit. Do not fill cookie shells too far a head of time, because they will get soft if they sit too long. If your pudding turns out too runny like mine did I found it was easier to toss the fruit in the pudding instead of putting a layer of pudding in the cookie shell.
23 November 2011
Chili
Chili
- 1 lb ground beef
- 1/2 onion diced
- 1 green bell pepper, diced
- 2 cloves garlic diced
- 1 can chili beans
- 1 can pinto beans
- 1 can kidney beans
- 1 can diced tomatoes
- 1/4 cup honey
- 1 cup water
- 4 tablespoons chili powder
- Chipotle Tabasco to taste (optional)
In bottom of a large pot brown ground beef with onions and garlic. Season with salt and pepper. Drain grease. Add in bell pepper, canned beans and tomatoes, water, honey, chili powder and if desired tabasco sauce. Bring to a boil and simmer 15- 20 minutes. Serve with shredded cheese or sour cream.
21 November 2011
Origami Box
It's been a long time since I've shared anything origami, but with Christmas coming up I've got a few origami projects up my sleeve that are perfect for the holidays. First, check out the origami gift bag I blogged about a few several months back. It's a cute little bag you can customize. Perfect for small gifts and goodies. Today, I'm going to share some video instruction for a masu box, a little box with a lid, also great for small gifts and goodies. You can also be customize these little boxes very easily. You can use whatever 12x12 scrapbook paper you like. You can use stickers, or stamp designs or names on the lid or draw on it with crayons... limitless possibilities. Seriously, just perfect for Christmas, right? By the way, if you are using the box for cookies and treats I would recommend lining the bottom of the box with a square of foil or parchment paper.
By the way, yes, I do know that the green and red box I make in the video is crooked and the lid is much too big. The thing is, I'm very OCD when it comes to folding paper. I like my folds nice and strait and very crisp. That means it takes me like f.o.r.e.v.e.r to fold my origami because I'll spend five minutes lining up an edge until it is absolutely perfect. In the end it turns out looking so nice. Just use the red polka dot box for reference. BUT, I also know no one wants to spend a half an hour watching me fold a paper box so I got past my OCD and made a box, a bit of a sloppy box in less than 10 minutes for you. If your lucky you might even hear a cute baby in the background. Now, if you find my video instructions hard to follow or just too long to want to watch a masu box is a pretty common origami fold. It wont hurt my feelings if you Google origami masu box or some combination of those words. You can find a lot of good tutorials out there.
18 November 2011
Bacon Wrapped Potato Bites with Spicy Sour Cream
Now that we are all healthy again bacon wrapped appetizers were on the menu for the football game. I found the idea on pinterest. If you look at my pictures. Some of the potatoes didn't get any bacon because I only had half a pound of bacon and to be honest, if I would have had more bacon I certainly didn't need to eat any more. These little devils were delicious, but really can you go wrong with bacon wrapped around a potato?
Bacon Wrapped Potato Bites with Spicy Sour Cream
- 3 large potatos
- 1 lb bacon
- olive oil
- 1 cup sour cream
- 1-2 tsp green Tabasco sauce
Cut potatos in half lengthwise and slice each half in to 4 or five pieces. Place potatoes in a pot of water. Bring to boil. Boil for 4 minutes. Remove from heat and drain. Toss potatoes in olive oil and season with salt, pepper,season salt, what ever tastes good on a potato. Cut each strip of bacon in half. Wrap a half slice of bacon around each potato chuck. Fix with toothpick. Place on a cookie sheet covered with foil (for easier clean up). Bake for 25-30 minutes until bacon is cooked through and reaches desired crispiness. Mix sour cream with Tabasco sauce.
Give Away Winner
Well, doing my first give away has been so much fun. I got 10 more followers via blogger through out the week and about 20 more on facebook. I'm going to be having even more fun in just a minute though because it is time to announce the winner of this lovely handmade crochet hat. There was a total of 16 entries, so thanks to every one that entered. I numbered each entry in order from 1 - 16 and went to Random.org and used their True Random Number Generator. So, can I get a drum roll..........
The Winner chosen by random.org is No. 5!
That means a huge congratulations goes to Katy. I hope you like your new hat.
16 November 2011
White Chocolate Cherry Pie
I kind of forgot I had signed up to feed the missionaries for our church for dinner last night. I remembered in plenty of time to cook dinner and all, but I didn't remember until after I did all of the grocery shopping. Now, I always make dessert when we feed the missionaries so I needed to come up with something using ingredients I already had on hand. I remembered I had a can of cherry pie filling, but one small can of pie filling isn't enough to fill a whole pie. So, I thought about it and was inspired by a recipe I have sitting around for a cookie pizza that uses sugar cookie dough covered with a layer of cream cheese and a layer of cherry pie filling. So I thought I could make a cherry pie with a layer of cream cheese filling. Perfect, since I have a french pastry shell recipe that tastes kind of like sugar cookie dough. However, I didn't want a layer of just plain old cream cheese so I searched the internet for inspiration. This is what I came up with and you don't even have to bake it!
White Chocolate Cherry Pie
- 1 precooked french pastry shell or graham cracker crust
- 8 oz cream cheese or Neufchatel cheese, softened (I usually replace cream cheese with Neufchatel cheese when I cook)
- 1 cup white chocolate chips
- 2 tablespoons milk
- 1 tsp vanilla
- 1 21oz can cherry pie filling
Beat cream cheese with an electric beater for 30 seconds. Melt white chocolate with milk in a double boiler, stirring constantly. When chocolate is mostly melted (with only a few lumps remaining) remove from heat and add vanilla. Stir until chocolate is completely smooth. Add chocolate mixture to cream cheese. Beat with electric mixer until smooth. Spoon mixture into pastry shell. Spread mixture so that it covers the whole bottom of the pie shell and is level. Top with cherry pie filling. Cover and chill for 2 hours before serving. (I think this would also be good with a chocolate cookie crust and semi-sweet chocolate chip instead white chocolate to make a sort of black forest pie) If you use neufchatel cheese and cut into 12 servings, each slice is approx. 366 calories. Cut into 16 servings: each slice 275 calories.

14 November 2011
Kraut Burgers
My mom would make these when I was growing up. She didn't make them very often. I guess it was often enough that when I needed to figure out someting to make to use the cabage from the garden these were the first thing that came to mind. Well, the only thing that came to mind.
This dish used 2 elements: bread dough and the filling (scroll down for the recipes)
And you are going to stuff the dough with the filling, go figure. I found it was easy to stuff by taking a square piece of dough and placing it in a small bowl and adding some of the filling. The small bowl helped keep the filling cupped in.
Then I took the edges of the dough and folded them to the middle so there were no holes
I put the seam side down on the pan. So the tops were nice and smooth. You could also use a rectangular shaped piece of dough, plops some filling on one side folds the other side over and crimps the edges together.
They only problem with my method was that a couple off the burgers (the ones with less filling) poofed up a lot in the middle. I'd still recommend this method for the easiness factor.
Butter Rolls
- 2 T. spoons of sugar
- 1 tsp salt
- 2 3/4 - 4 cups flour (enough that your dough isn't sticky)
- 2 tsp. active dry yeast
- 1/4 cup warm water
- 1 egg
- 7/8 cup of milk, warm
- 1/4 cup butter
Dissolve yeast in warm milk and warm water (don't get it too hot (only about 110F-115F or you'll burn the yeast and it wont rise well.) Mix in sugar. Mix in remaining ingredients. Knead for 7 minutes. Let rise for 1 hour or until double. Punch down dough. Stuff dough at this point if you are using the dough for the kraut burgers. If you want to use dough to make rolls, shape dough into the desired shape of roll (makes great crescent rolls. Let rise for another 20-30 minutes. Bake at 350F for 25 minutes.
Kraut Burgers
- 1 batch of Butter Rolls Dough (Because this recipe is a small recipe it makes just enough for the burgers, but you could use your favorite bread recipe as well)
- 1 1/2 pounds ground beef
- 1/2 head green cabbage, chopped
- 1 medium onion, chopped
salt and pepper to taste
Brown ground beef in skillet. Drain all but 2 tablespoons grease. Mix cabbage, onion and salt and pepper in with the beef. Cook until cabbage and onions are tender. Drain remaining grease. Roll dough out to about 1/8 inch thick, using a pizza slicer cut rolled out dough into 8 portions. Stuff dough and place on a greased cookie sheet. Bake for at 350F about 25 minutes or until bread is golden brown.
10 November 2011
Onion Dip
Onion Dip
- 1 1/2 cups sour cream
- 1 1/2 cups Miracle Whip
- 1 pouch dry onion soup mix
Mix all ingredients together. Chill. Enjoy!
50 Followers Give Away!
****This giveaway has closed****
It's taken a while, but my blog has finally hit 50 followers. In thanks for all of your support I've decided I want to do a give away. Because the weather is getting cold and I like to crochet, I will be giving a handmade crocheted women's hat away.
Don't you like the nice fall colors? |
Check out the detail on the ribbon style stripe and the twisted edging. |
If you want a chance to win this lovely hat
- You can get one entry by following my blog publicly and leaving a comment letting me know you follow my blog.
- You can get one entry if you follow my Facebook page and leave a comment letting me know you are a Facebook fan. (You don't have to do the first one to do this one)
The giveaway will run until Thursday, Nov 17 and I will announce the winner Nov 18. Spread the word so your friends have a chance to win too (unless you really, really want that hat, then I would recommend keeping it to your self so you have less competition.) You can also check out my Etsy shop to see what other stuff I make and remember, I take custom orders.
09 November 2011
Mini Microwave Cheesecakes
I've decided I really love pinterest. I've been seeing so many wonderful crafts and delicious recipes and it also sending a lot of traffic my way. This post is one of those delicious recipes. Pinterest brought me across this recipe for Microwave Lime Cheesecake. OMGsh! Cheesecake quickly made in the microwave? I think I found a little piece of Heaven here on earth. I new I had to try this, except I was thinking regular cheesecake was sounding better than lime cheesecake. So I altered the recipe a little to just make a plain old vanilla cheesecake. Just as Patent in the Pantry mentions. This isn't going to make a beautiful silky cheesecake. We're working with the microwave here and making cheesecake in a ridiculously quick amount of time. But, it still makes a delicious little cheesecake that you can whip up anytime your craving cheesecake. The recipe makes plenty for 4 little cheesecakes.
Microwave Cheesecake
Crust
- 1/2 cup graham cracker or cookie crumbs
- 1 tablespoon brown sugar
- 2 tablespoons melted butter
Mix crumbs, sugar, and butter. Divide among 4 small ramekins or jars. Press into the bottom of ramekins.
Filling
- 8 oz cream cheese, softened
- 1/3 cup sugar
- 1 1/2 tablespoons milk
- 1 teaspoon vanilla
- 1 egg
07 November 2011
Santa Fe Chicken Fajita Soup
I came across this recipe while I was in college. This is one of those soups that I really love on cold day. I found it on Kraftfoods.com. I like this recipe just the way it is as found on kraftfoods.com, but as I've mentioned before my husband isn't a big Velveeta fan so we've made some minor changes. Sorry, the pictures are so horrible. My crappy camera and I don't get a long during the winter months.
Santa Fe Chicken Fajita Soup
- 1 pkg. Fajita Seasoning
- 1/3 cup water
- 1 lb. boneless skinless chicken breast, cut into thin strips or cubed
- 4 large cloves of garlic, minced
- 2 T. chopped fresh cilantro (or 2 t. dried cilantro)
- 1 Large onion (red or yellow), chopped
- 1 green pepper, chopped
- 1 pkg. (8 oz) cream cheese (preferably low fat), cubed
- 1/2 lb. Velveeta, cubed
- 2 cans (14.5 oz each) chicken broth
- 1 cup shredded cheddar cheese
Combine fajita seasoning, (dry cilantro) and water in medium
bowl. Add chicken; toss until evenly coated. Cover and refrigerate at least 30
min. Spray large stock pot with cooking spray. Add garlic and fresh cilantro;
cook on medium-high heat 1 minute. Add chicken mixture, onions and peppers to pot, mix
well. Cook 10 minutes or until chicken is cooked, stirring frequently. Add cream cheese, Velveeta and chicken broth;
mix well. Reduce heat to medium. Cook until Cream cheese and Velveeta are
melted and chicken is heated through, stirring occasionally. Add shredded cheddar cheese. Remove from heat as soon as cheddar cheese is melted. If desired serve with tortillas or tortilla chip, sour cream, and shredded cheese.
Subscribe to:
Posts
(
Atom
)